![]()
![]()
![]()
|
|
|
|
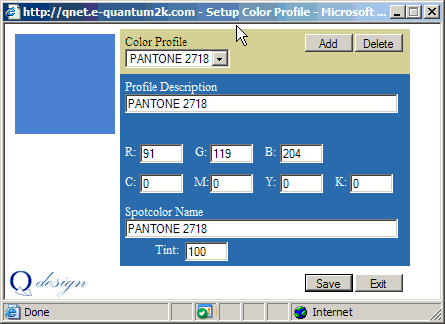
Here you will select the colors that will be used on your template. By setting up color profiles, the designer will save time and increase the accuracy of proper color usage. When the designer makes a color change to the profile, all template objects that use that color will be automatically updated. It will allow the designer to quickly test color schemes without having to touch every template object.
|
NOTE: Up to ten colors can be added to each template |
The following table describes the elements and description of the Color function.
Color Element |
Description |
|---|---|
Color Profile |
Lists all the color profiles created for the current template. |
Add |
Adds a new profile to the color profiles |
Delete |
Confirms deletion of the current profile |
Profile Description |
Used to identify the color profile to the designer and will display in the color profile combo |
R,G, and B Fields |
Used primarily for screen display and represent red, green, and blue. The valid ranges are 0 to 255 |
C, M, Y, and K Fields |
Used for process color and represent cyan, magenta, yellow, and black. The valid ranges are 0 to 100 |
Spotcolor Name |
Represents the spotcolor name, (i.e., PANTONE 695 U) |
Tint Value |
ranges from 0 to 100 |
|
WARNING: When the generated PDF will be imported into QUARK XPress or Illustrator, the color name should be entered in the following format: "PMS 695 C". For all other outputs the color name should be entered in its valid format: "PANTONE 695 C" Spelling accuracy counts! |
To begin adding colors:
Step 1: From the Main Screen, click Color.
Step 2: The Color Profile window will open. Click Add.
Step 3: Click on the Color Swatch for automatic selection, or type in a name in the Profile Description field and the corresponding color values.
|
NOTE: Clicking on the color swatch in the upper left of the window, will display the Pantone color chart window. By clicking on the color swatch, it will import that color information back into the current color profile |
Step 4: Click Save.
Step 5: Repeat the process to add all the colors needed.